- The Marble Factory will be closed for Canada Day and the Calgary Stampede from July 1st - July 8th and will re-open July 9th.
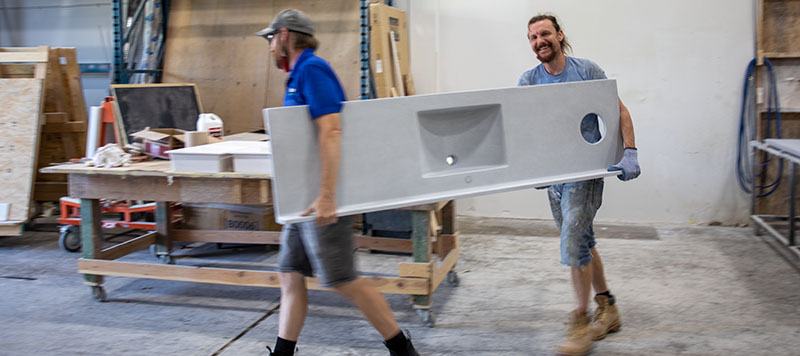
When you receive your Marble Factory vanity top, please take time to ensure the following:
Be sure that the box and crate have not been damaged. Check that the top is not broken. If side splashes were ordered they will be attached to the box underneath the vanity top. They will be tagged wth red tape. The following is a guide only. Every home, cabinet and plumbing configuration is different and may require a modified approach than the one in this guide.
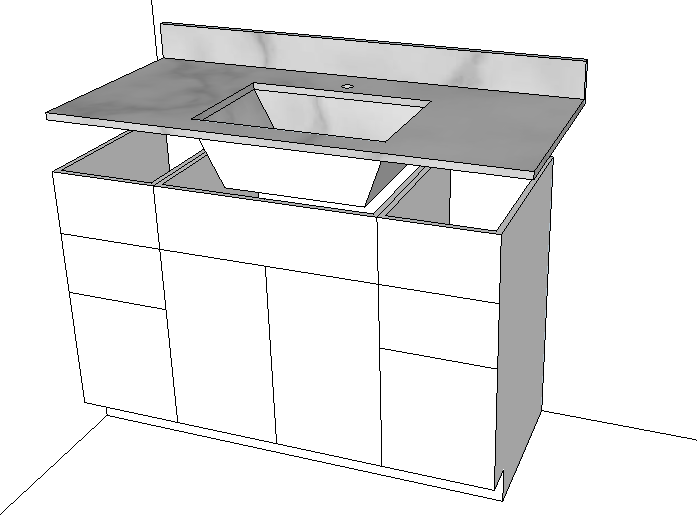
Please ensure the cabinet is level and secured to the walls. Fit your new vanity top, ensuring proper fit and overhang. There is often a slight gap between the wall and top that can be filled using a small bead of quality kitchen and bath silicone. A separate side splash (if purchased) or tile may also cover this gap. If no sidesplash is wanted you may need to trim the vanity top. Use of a belt sander, sand paper, grinder or masonary blade on a skill saw will help remidy this situation. Be sure that the vanity sits flat on the cabinet and that the bowl is not suspended by the cabinet. Trimming of the inside of the cabinet maybe required.
 2.SANDING AND CUTTING
The Marble Factory vanity top can be cut and sanded using standard wood working tools. If a hole is required simply drill the size and location required. If a wall is out of square simply belt sand or grind the appropriate location and amount needed. Vanity tops between walls may require trimming or sanding due to walls being out of square. The Marble Factory vanity tops can be slightly larger or smaller than ordered due to the manufacturing process. Please note that sanded areas will lose the finished surface. Edges that are against walls and non-exposed sides are best to be sanded or machined.
Please follow all safety practices when using power tools. A certified dust mask, eye and ear protection must be used. Vacuum extraction is recommended.
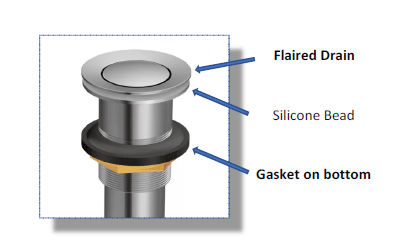
The Marble Factory recommends a metal or plastic drain with a flaired or tapered drain. These types of drains will minimize the standing water around the bottom of the drain and basin area. Use 100% silicone for sealing the drain and faucet to the vanity top. Do not use plumbers putty as this may stain the vanity top surface and will void the warranty.
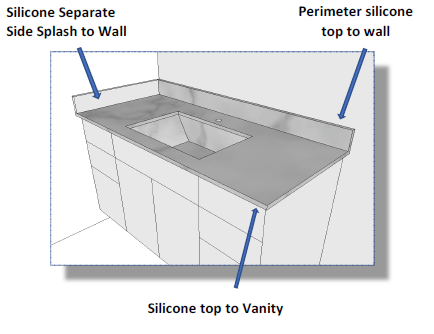
A few small spots of silicone on the vanity will secure the vanity top. If installing the optional sidesplash, remove it from the wrapping , wipe with a rag and apply 3 Quarter size blobs on the back side. Push the side splash into position. Once the vanity top has been completely plumbed and installed apply silicone to the gaps between the vanity top, side splash and walls. There are various colors of silicone available at your local hardware store, select one that is closest to the color of your vanity top.
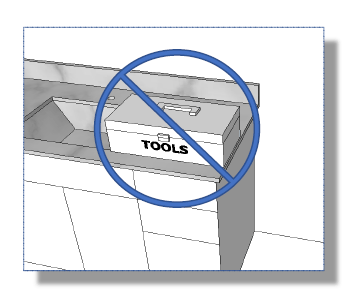
Damage to the vanity can occur during construction. We recommend that the plastic protective surface remain on the vanity top as long as possible. Extra protection maybe required during heavier construction periods such as tiling or demolition. Avoid putting tools and construction materials on the vanity top without protection. Standing on the top of the vanity top is not recommended.
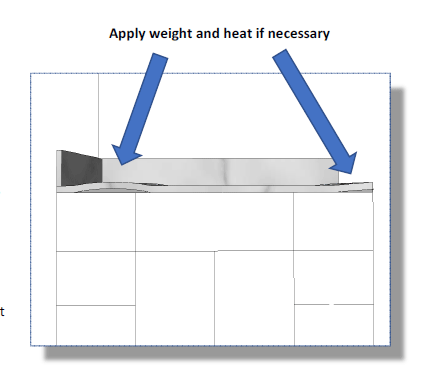
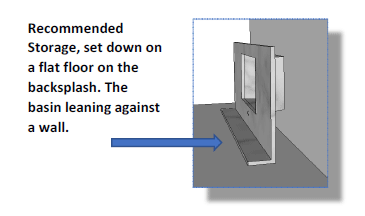
Your new vanity top has travelled in a cardboard box for most of its new life. We recommend that the new vanity top be placed on the cabinet as soon as possible. However if extended storage is required place vanity top on its backsplash against a wall. If the vanity top has a slight sag or warp it can be straightened by installing the top and applying weight to the raised area. Be sure to protect the surface of the top with a towel or soft cloth before adding weight. To speed up the process a heat source such as a hair dryer or heat gun can be used.The surface temperature should not exceed 95 Degrees Farenheit.
Your hot water tank is recommended to be set at 120 degrees Fahrenheit. This prevents scalding, saves money on your utility bill and prevents thermal cracking of your vanity top. Check your hotwater tank and make sure it is not hotter.
The gloss surface is made a hard ploymer finish. It is maintained using only liquid cleansers. Never use abrasive cleaners on this surface. The finish can be polished using an electric polisher and a buffing compound.
The vanity top has been lightly sanded to achieve the matte finish. Liquid cleansers are still recommended however stubborn stains can be removed with an abrasive cleaner.