Marble is more than just a beautiful material for kitchens and bathrooms. It’s the result of a long and detailed process that starts deep in the earth. We often admire the shine and patterns in finished marble, but few people know how much work goes into transforming raw stone into something so refined. Understanding how marble is cut, polished, and finished can help us appreciate the effort behind each piece.
We work with this material daily, and over time, we’ve come to respect every stage of its journey. From the first crack of the quarry to the final polish, the process requires precision, skill, and the right tools.
Every slab of marble begins underground. It forms over millions of years as limestone is subjected to intense pressure and heat. Once marble is located, specialized equipment is used to remove it from the quarry without damaging the structure.
Firstly, we identify a block of stone that looks stable. Then, we use wire saws with diamond beads or chain saws with special abrasives. These tools slice through the rock while keeping it intact. In other words, we’re making careful cuts to separate a block from the mountain without cracks or breakage. Water is sprayed constantly to reduce dust and cool the machinery.
After that, the large block is lifted with cranes or hydraulic jacks. Most importantly, it must be transported in a way that avoids chipping or vibration. Each raw block weighs several tons and must be handled slowly and safely. The stone is then loaded onto trucks and shipped to processing facilities where the cutting and finishing take place.
Once the marble block arrives at the cutting facility, it goes through a gang saw or block cutter. These machines use multiple blades that move back and forth or down vertically to slice the block into slabs. Typically, these slabs are between 2 and 3 centimeters thick.
At this stage, the marble looks dusty and dull. However, it already reveals its basic veining and color tone. We often inspect each slab closely for cracks or weak spots. Some slabs might be strengthened with a thin mesh backing before moving forward, especially if the stone has natural fissures.
For anyone working with a marble manufacturer, it’s essential to understand the differences between slabs at this early point. To see a full range of raw and finished options, you can explore the available marble products from our facility.
After cutting, the next step is leveling. We call this calibration. It ensures the marble slab has a consistent thickness from edge to edge. A machine passes over the surface with grinding wheels that remove excess material and smooth any high points.
This part might not sound exciting, but it’s critical. A slab that is even one or two millimeters off can cause problems during installation. Uneven tiles or countertops can lead to gaps, cracks, or warping over time. So, we take the time to get it right.
Meanwhile, any imperfections from the sawing process—like minor lines or edge marks—are also removed during calibration. The goal is a flat, clean surface that’s ready for polishing or further treatment. We inspect the surface again to make sure there are no deep scratches or problems that would affect the finish.
Polishing is where the beauty of marble really comes alive. Depending on the desired result, we may polish the surface until it shines like glass or stop early to achieve a matte or honed effect. Most polishing machines use progressively finer abrasives—starting coarse and gradually refining.
Firstly, we run the slab through polishing heads with diamond grit pads. Each pass removes a layer of material and smooths the surface further. As a result, the slab becomes more reflective and begins to show its true color and veining.
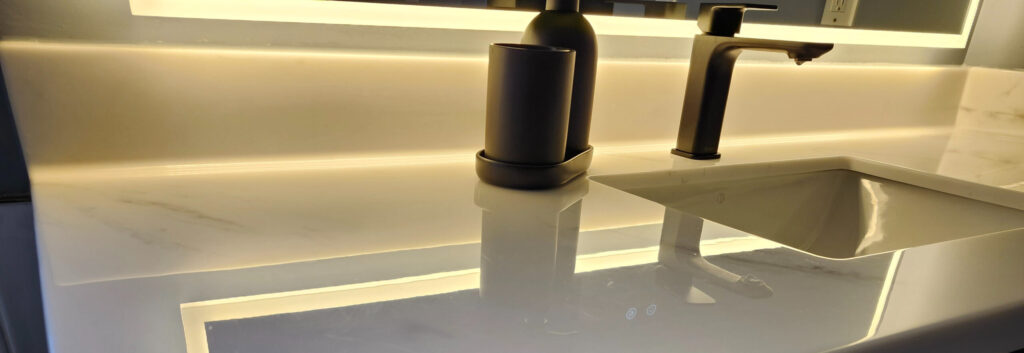
Not everyone wants a high-gloss finish. Some clients prefer a soft, matte look, especially for bathrooms or subtle kitchens. In those cases, we stop the process earlier. That is to say, we customize the polish depending on how the stone will be used. After polishing, we often apply a sealant to protect the marble from stains and moisture.
Once the surface is polished, the slab may be trimmed or shaped for its final purpose. This might include rounded edges for countertops, cut-outs for sinks, or custom shapes for decorative panels. We use CNC machines or hand tools depending on the complexity.
This step is especially important when we create custom pieces. For instance, bathroom vanities often require smooth inner curves that must be both functional and beautiful. Similarly, staircase treads might need precision grooving or beveled edges for safety and style.
At this stage, we also do a final inspection. Any hairline cracks, chips, or color inconsistencies are addressed. If anything looks off, the slab may be filled with resin or discarded depending on the severity. Our goal is always to deliver a product that meets expectations and performs well in use.
Every slab goes through one last round of checks before it is delivered or installed. We look at thickness, polish, color uniformity, and any flaws. If the slab passed all earlier stages but has issues now, it may be repurposed for smaller projects instead of full countertops or tiles.
Additionally, we label each piece with clear information for installers. This includes the origin quarry, slab number, dimensions, and intended finish. This reduces errors during installation and helps clients track their materials.
For those interested in seeing how different marble types look once fully finished, our collection of natural stone surfaces gives a helpful overview of common colors and patterns. You can explore these surfaces in the marble product catalog any time.
Not everything always goes smoothly. Marble can crack during extraction, warp during drying, or polish unevenly. One of the biggest challenges we face is veining that runs against the intended cut. When this happens, the slab may appear inconsistent or break along the lines.
Another common issue is moisture trapped in the stone. Even after polishing, water inside the marble can cause spots or dull patches. That’s why we let slabs rest and dry completely before sealing or finishing.
In addition, transportation needs to be handled with care. A polished slab can still chip if moved too roughly. So, we make sure all finished pieces are packaged securely and handled gently until they reach their final destination.
Not every project calls for a glossy marble finish. For example, high-traffic floors often benefit from a honed surface because it provides better grip. On the other hand, a kitchen island may look best with a polished top that reflects light and shows off the veining.
If you’re planning a new installation, it helps to think about more than just appearance. Ask how often the area will get wet or whether it will see regular wear and tear. This will guide you in choosing the right finish.
Above all, don’t hesitate to ask for help. Whether you’re a contractor or homeowner, we’re always here to provide guidance. If you’re looking to start a new marble project, you can contact us for professional advice and support every step of the way.
1. What is the difference between honed and polished marble?
Honed marble has a smooth, matte surface, while polished marble is shiny and reflective. Both finishes can be sealed, but polished marble often shows color and veining more vividly.
2. Can marble be used outdoors?
Yes, but it depends on the type and finish. Some marbles are more porous and may weather over time. For outdoor use, a honed or textured finish is often better to reduce slipping.
3. How long does the polishing process take?
Polishing time depends on slab size and the desired finish. Typically, it can take several hours per slab as we pass it through multiple polishing heads with different grits.
4. Is there a way to prevent marble from staining?
Sealing is the best way to protect marble from stains. Regular maintenance, including resealing every year or two, helps preserve the surface and keep it looking new.
5. Why do some marble slabs have mesh backing?
Mesh backing reinforces slabs that have natural veins or fissures. It helps prevent cracking during cutting or installation, especially with more delicate varieties of marble.

* Excluding Long Weekends